


Acrylic for Needlepoint Finishing: Part 1
Intro to acrylic finishing: my hot take & tips for working with a finisher

Acrylic for Needlepoint Finishing Series
We’ll cover the following topics.
Intro to acrylic finishing (This kicks off below)
Comparing your three primary options
Tips for working with a finisher
#1 tip for elevating the look of your acrylic
Diving deeper into the three acrylic options
Pre-made acrylic products for needlepoint
Custom fabrication
Adapting other pre-made products for needlepoint
Tutorial (paid subscribers only): Detailed process tutorial on how to finish a flat for an acrylic tray
Specifications sheet (paid subscribers only): Downloadable guide to getting your measurements right
As part of this series, a lot of this content will be free and public but I’ll also share a few juicy things for paid subscribers as noted above.
Substack is doing a promo for one month free if redeemed Nov 1 through Nov 9. Make sure you subscribe to the free version here if you haven’t already.
I believe they will email you to upgrade for free for a month if you get the app. Please note, that is sent through Substack corporate and not me so I don’t have a ton of details aside from this!
Intro to acrylic finishing
Acrylic products are popular and offer a modern edge to the traditional art of needlepoint. It offers the satisfaction of a fun self-finish, the ability to merchandize and swap out, and opens the door to custom fabrication for different formats or sizes.
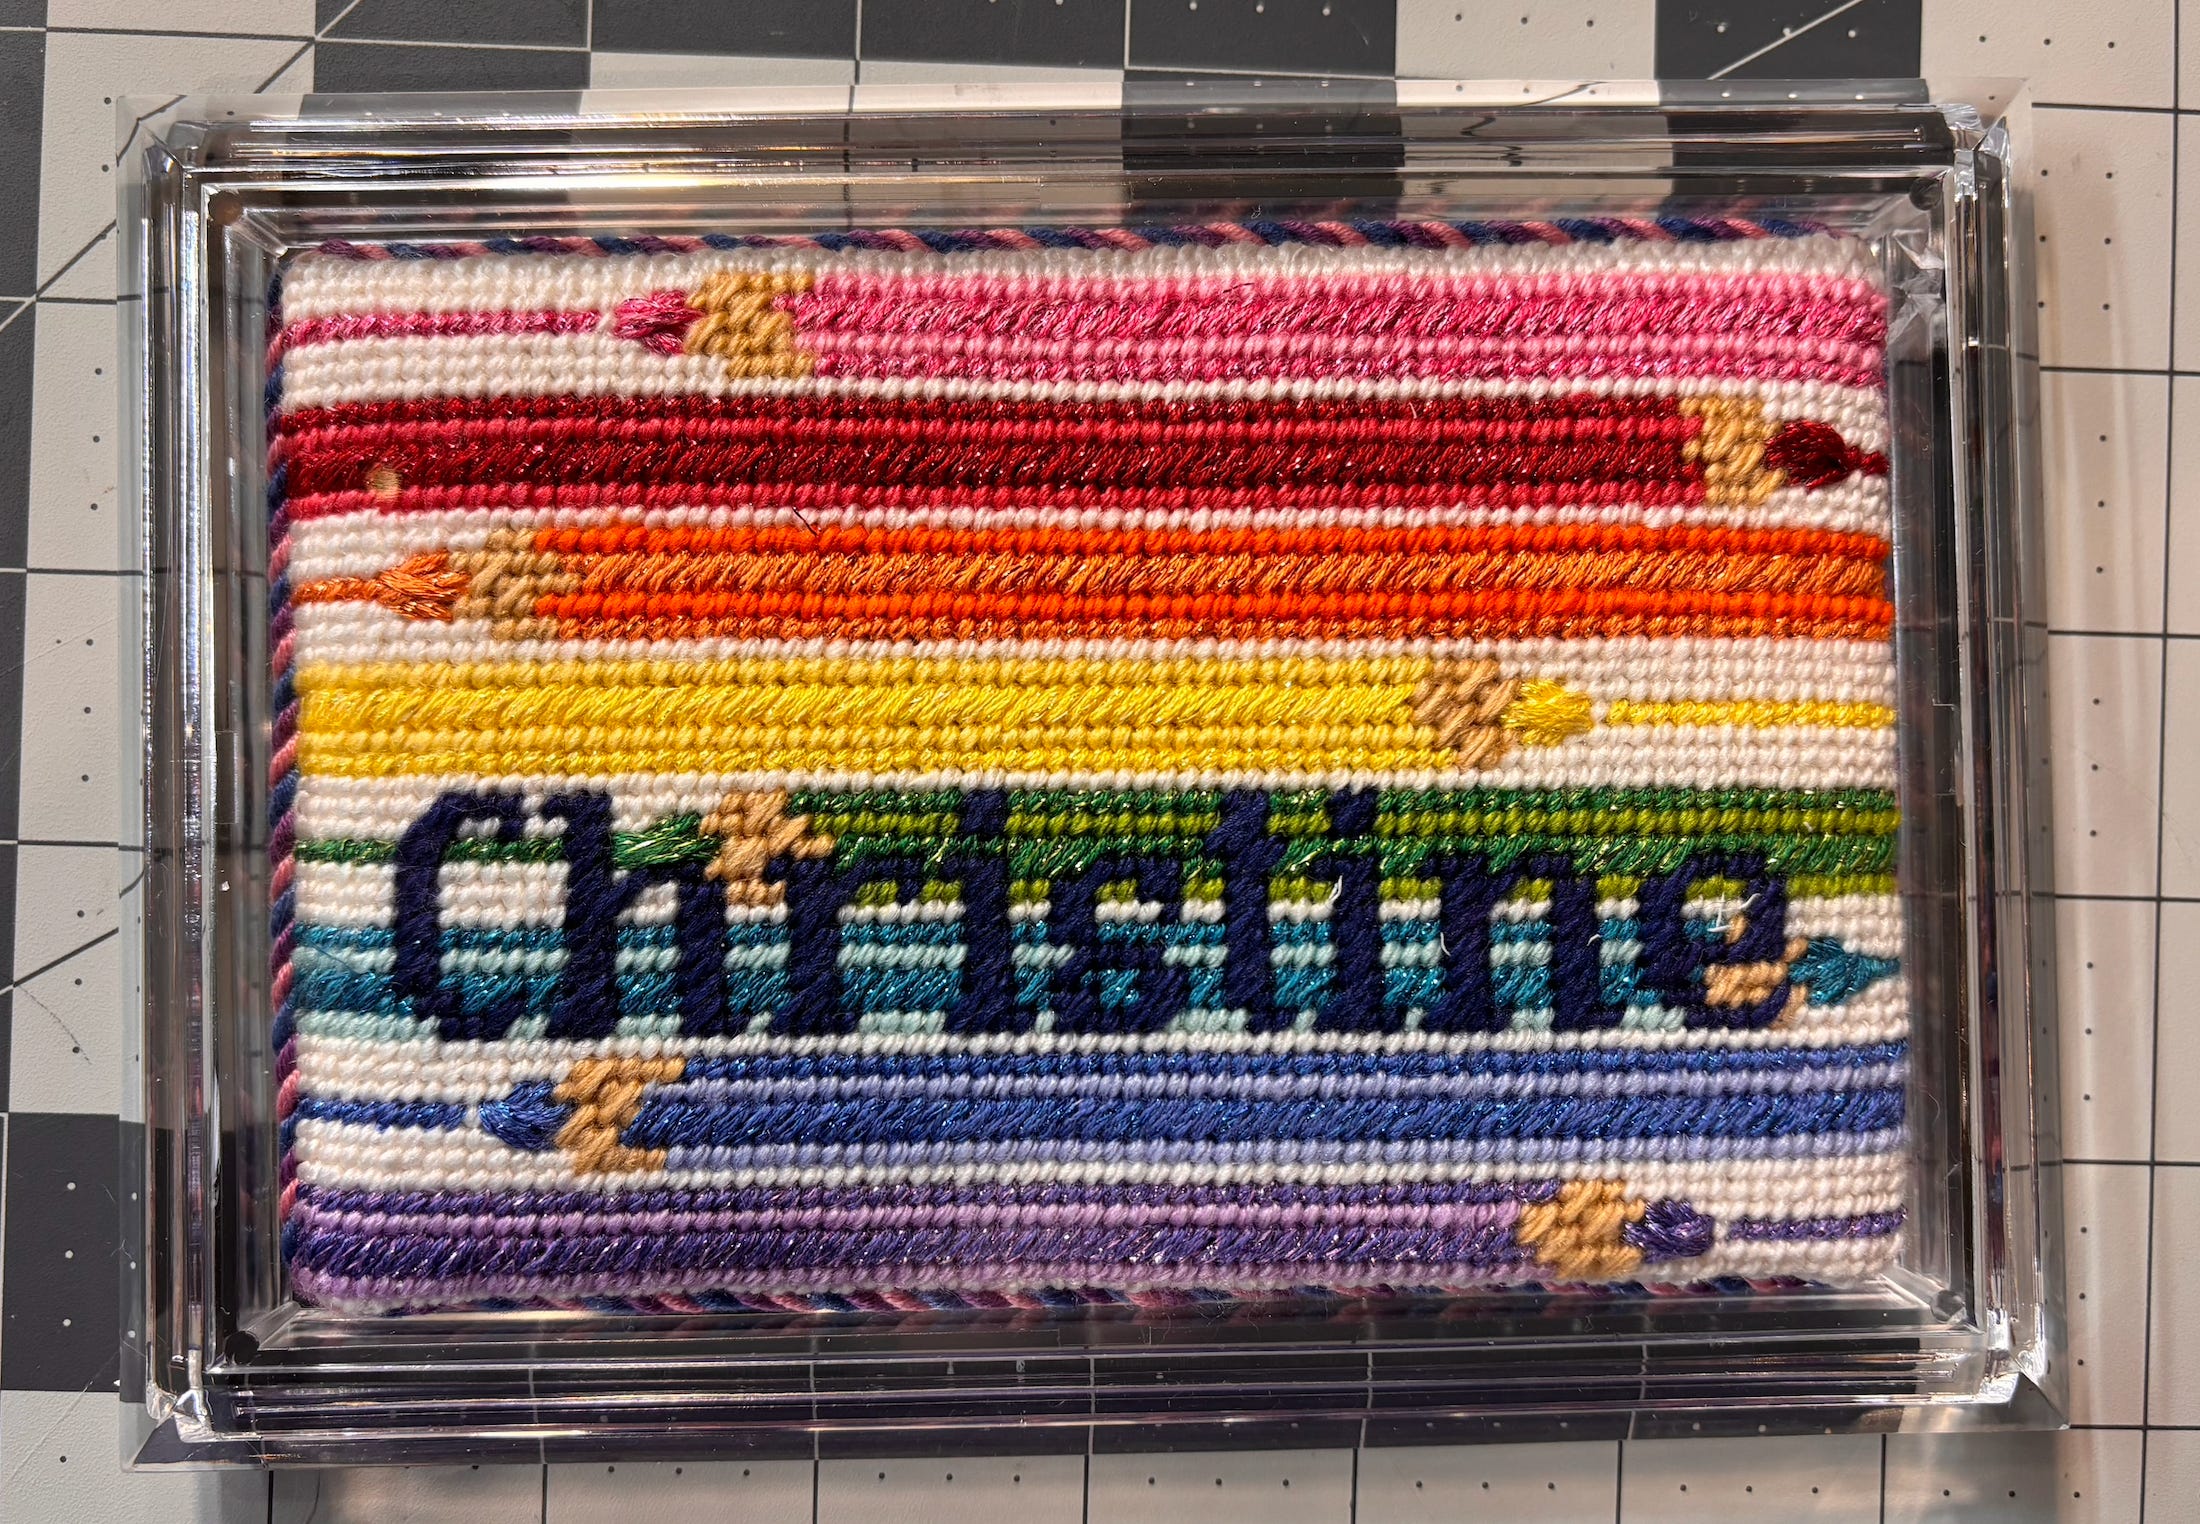
If you’re new to needlepoint, the term acrylic finish means a custom or pre-made acrylic product houses your needlepoint and typically serves another function, too. Often, the needlepoint is finished as a flat, meaning it does not have any loop at the top and the cording has a join, lending a clean look.
Inspiration


Photo Credits L-R by row:
Finishing by the Needlepoint Finishing Fairy (on my Instagram)
Your acrylic options for needlepoint
Purchase a pre-made acrylic product designed for needlepoint
Pursue custom fabrication through a needlepoint shop, independent finisher, or directly through an acrylic manufacturer
Adapt other pre-made products for needlepoint
Each have their pros and cons which we’ll explore more. Regardless of the path you choose, you need to make sure the stitched project fits.
Which brings me to my hot take: I have seen a lot of finishes that could be elevated with just one small tweak: a cozy, snug fit.
A proper fit is one of the best FREE ways to elevate the look of your acrylic product and make it look really custom, even on pre-made options.
What makes for a perfect fit?
If you want a good, snug fit that elevates the look of your needlepoint, here’s what you’re looking for:
Twist cord ideally should just *kiss* the inside of the acrylic walls
If you shake your acrylic, it doesn’t move around inside
If you can see through the bottom around the needlepoint, it could be more snug
If the cording looks smushed or strained in the acrylic, it is too snug
5 tips for getting a perfectly snug fit when working with a finisher
If you’re sending your project to a finisher and you want a perfect fit for your acrylic, I recommend the following:
Find a finisher who prioritizes fit. Some finishers don’t. Look at their previous work. This is probably less important if you go the custom fabrication route, but that said, I have seen some loosy goosy flats in custom acrylic. Ask them: How do you ensure a snug fit? What does a perfect fitting acrylic mean to you? Can I see a few examples up close?
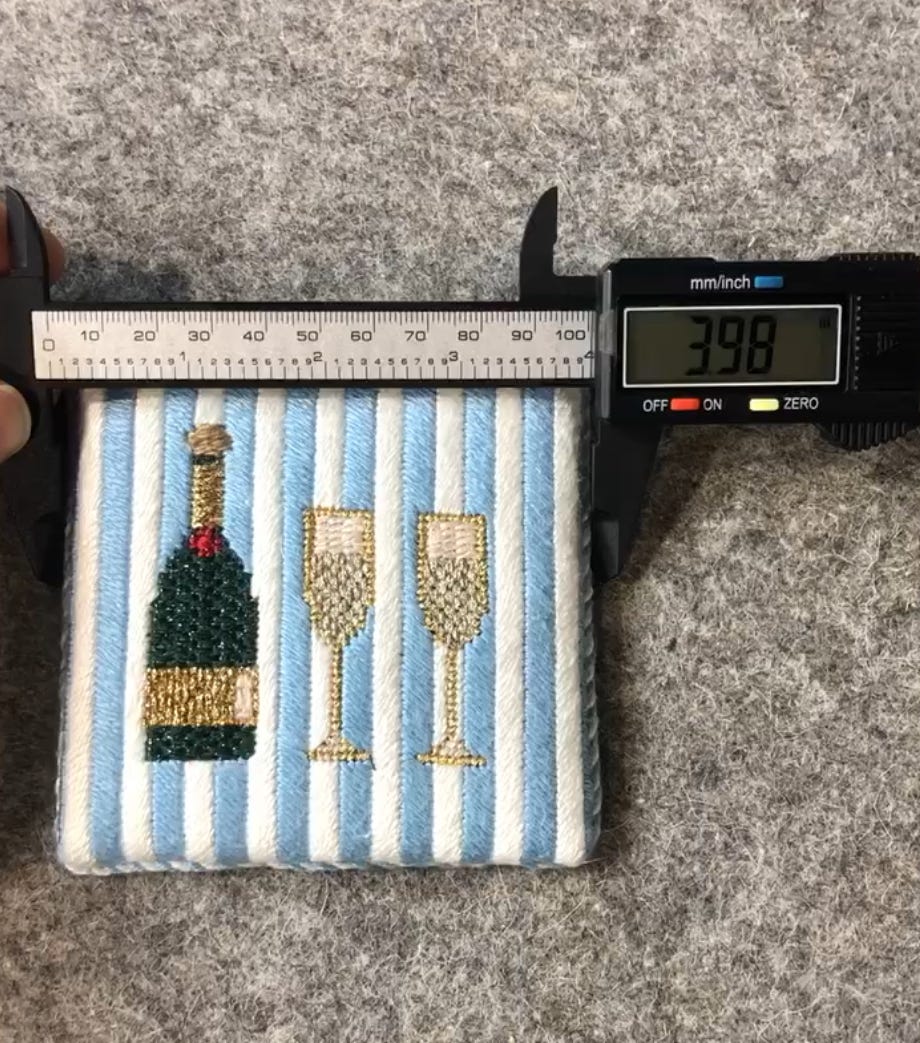
Recognize that 4 inches does not always equal 4 inches. Not all 4 inch acrylic coaster squares are all the same size or depth. They can differ by mere millimeters but those millimeters matter to a finisher that prioritizes a snug fit.
TELL YOUR FINISHER IT’S FOR AN ACRYLIC!!!!!! I have a finisher friend who just finished a flat and did not know it was for an acrylic. The resulting flat too large by a few millimeters so it doesn’t fit in the object! It will need to be redone at the stitcher’s expense. Be sure to give us all the details–especially if you’re stitching something for a designated sized space (BTW, just added this to my form as a prompt and highly suggest this for other finishers)
Ask your finisher if they’d like you to send your pre-made acrylic along. If you tell me your project is for an acrylic, my first question will be: which one? If it’s one I stock, you don’t need to send. If it’s different, sending at least half (if there are two parts) or sending precise, photograped interior measurements will help your finisher get that snug fit you want.
Stitch the right size. If you stitch 3.5 inches and your acrylic is 4 inches, your finisher can’t do much about that (aside from insetting it in fabric). You also don’t want to stitch too much. Because that extra stitched material needs to be folded under, and that will result in a thicker flat, which could cause fit issues depending on the depth of your acrylic product.
I hate that the art of frame finishing is fading away. I just sent off a frame and it’ll be about a year until I see it again. I told my LNS I would also love to learn to finish frames for others! But also received a similar response.