


Behind the Finish with Kayla Fay
Learn more about the brains behind Fire and Iris, and how she balances her research career and this passion project.

I reached out to Kayla because I am ABSOLUTELY in my 3D era, and I love all her 3D canvases like her new lanterns, campers, s’mores, kayak, and shell. Heck, she even has a whole 3D section on her website!
She does a lot of finishing herself, and as a designer too, has a unique perspective on designing with the end vision in mind.
Amanda: Tell us a little bit about you! When did you start stitching? When did you start designing?
Kayla: Love this! I started stitching when I was about 6 or 7, and had learned from my grandma. We were big thrift store people, my grandma watched us when we were kids and would take my siblings and I to various thrift stores, in part for something to do with 3 kids, and also to see what toys/crafts we could find. One day we found canvas, threads and a number of chart books (what a treat!). So I actually learned by stitching the charts from the books right onto the canvas. Needless to say I was very happy when I learned that already painted canvases exist!
I started designing in 2020 - I had just finished graduate school, and I suddenly had quite a bit of free time, with very few places to go. I was hiking a TON and started looking for designs related to this. I found some, but nothing that was exactly what I wanted. So I bought some paint and some canvas and here we are!

Amanda: Do you run Fire and Iris full time or part time? If you run it part time, what do you do in addition to Fire and Iris?
Kayla: Sadly, Fire and Iris is part-time for me. I have a full-time job in cancer research at a non-profit hospital. I’ve been in research for over ten years now and I truly love it so much. I hope to one day scale back to have both be part-time, but (at least for now) I don’t think I ever want to leave research entirely.
I like that I get to use both parts of my brain, and I find that each makes me better at the other. On days when I spend all day doing stats, writing protocols or manuscripts, while I may be exhausted from that, I find it lights up the creative side. On the flip side, after spending a whole day painting, or designing, I find I’m asking better research questions. And I like that I have the balance between the two.
Amanda: Tell us a little bit about the rebrand! It feels so fresh and unique and it seems very true to you!
Kayla: Right! I am so beyond obsessed. It was definitely time. I had started Fire and Iris after finding a need for more outdoorsy related canvases and found that really resonated with a lot of others. Admittedly, I got a little caught up at the start with thinking I needed to create a certain type of canvas, and catering to what I thought people would like. But I quickly found that it not only wasn’t enjoyable for me to design, those canvases really didn’t seem to resonate with other people (probably because people could tell I wasn’t as excited about them). So I started to really lean into the things that I really enjoyed, canvases I really wanted to stitch and designs I really wanted to see. Its been a lot of work to find myself and bring the vision of Fire and Iris to the world, but since shifting and focusing on staying true to myself, I am not only much happier and confident with my work, but I think I’ve cultivated a vibe that is true and unique to Fire and Iris. So last fall I started working with Emma from The Lookout Co (who is truly amazing), and she helped bring the way I’ve been feeling about Fire and Iris to a visual brand display and I am truly so happy with it.
Amanda: Tell us a bit about the mission of Fire and Iris:
Fire and Iris is dedicated to reimagining the craft of needlepoint by blending tradition with accessibility and fun. The brand seeks to make needlepoint an enjoyable, approachable art form for everyone, celebrating both its rich history and the joy of creating unique, lighthearted designs. By fostering a community centered around creativity, education, and collaboration, Fire and Iris encourages stitchers of all levels to explore their artistic potential. The mission is to offer a fresh perspective on needlepoint, making it a craft that brings happiness and connection to all who engage with it.

Kayla: I firmly believe in our mission. Having learned from my grandma, I love the history and tradition of needlepoint, and that is something to be shared with those we love. I want to be sure to honor that tradition, and continue to share needlepoint as a time honored craft, and the best way I know how is through sharing canvases and, most importantly, sharing needlepoint through education. I also learned to stitch via thrift store charts and so its also important to me to have plenty of accessible needlepoint options. Its why I offer plenty of charts, beginner kits under $50 (which include all materials needed to stitch and finish a needlepoint piece) and even started the “half-painted series”.

This series was designed to bridge the gap between a chart and full painted canvas, offering a painted canvas and stitch guide for under $30. Stitchers still have a physical canvas that they didn’t have to paint, and the written and video guide shares how bring the design to life with only a few stitches.
I genuinely love the craft of needlepoint and I love sharing that love with others and at its core, that’s really the mission of Fire and Iris.
Amanda: I just love your line of canvases and all the fun 3D options, especially the smores and camper. I’d love to make one of those for my parents one day, since they’re big campers! Tell us a little bit about how you got these ideas.
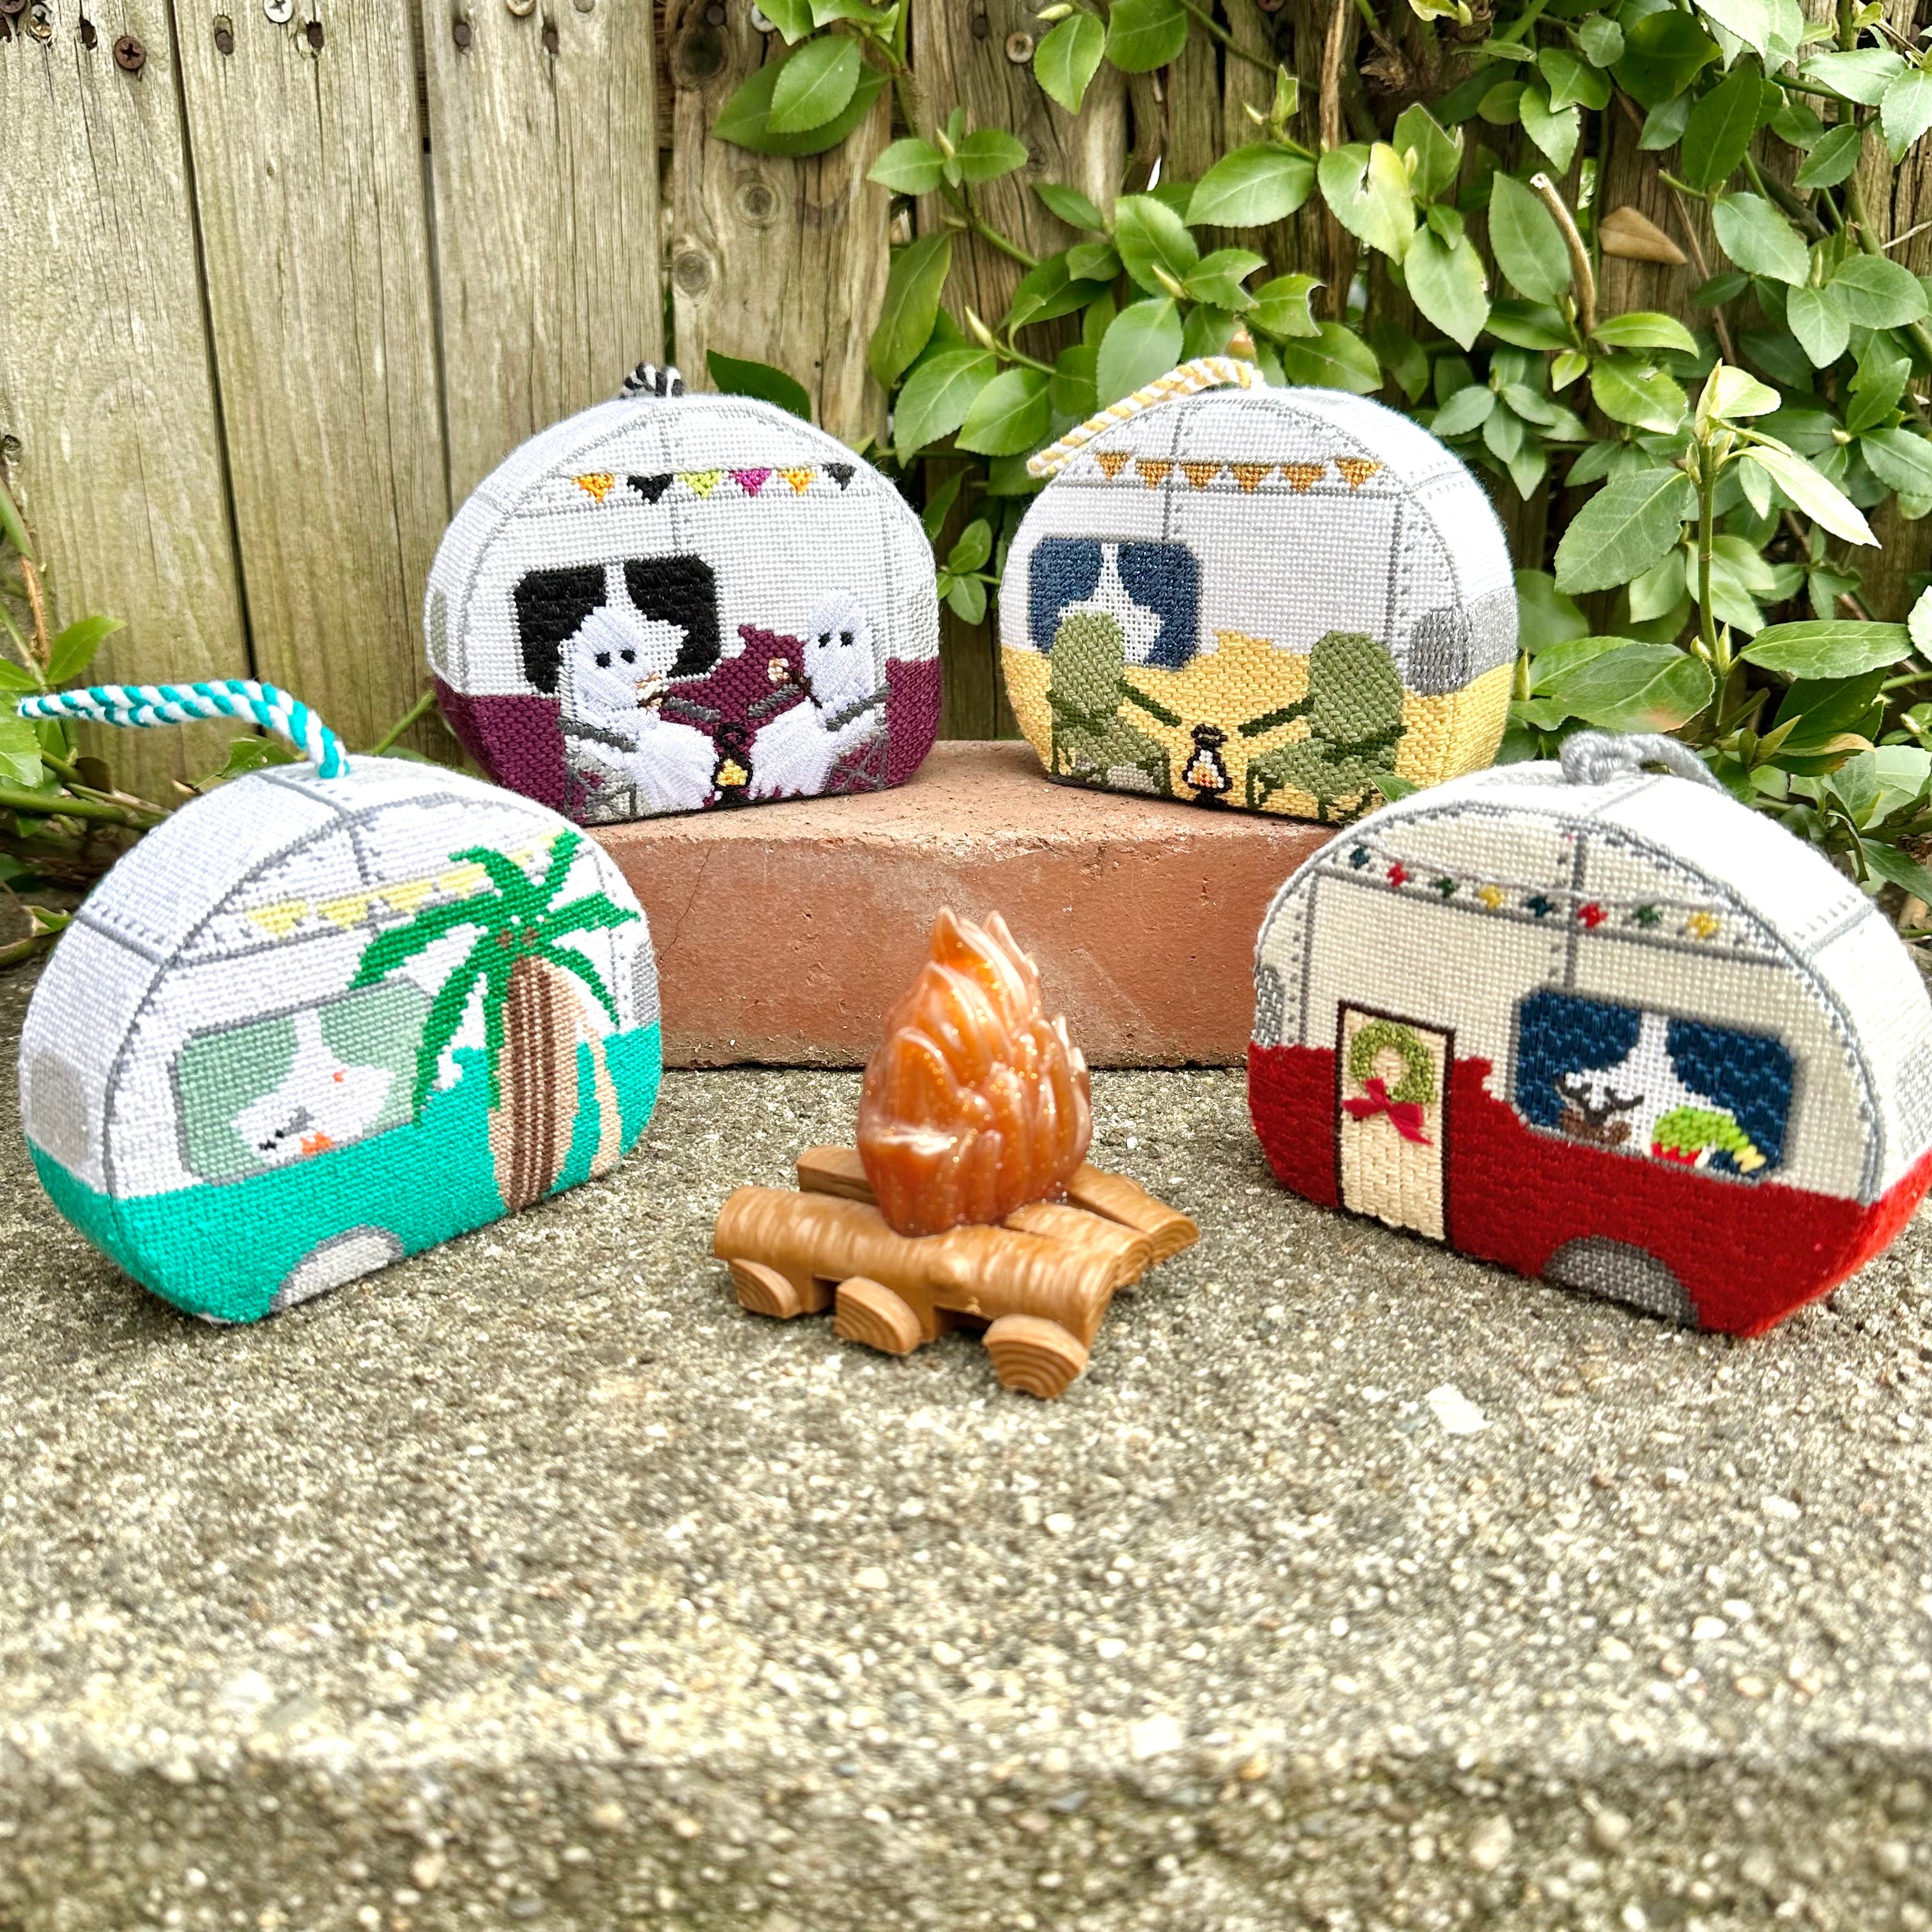
Kayla: I’ve always been a big outdoors person and I’m also OBSESSED with 3D needlepoint. Designing itself is a fair bit of math, but 3D elevates that math, adding in geometry and I absolutely love the challenge. The 3D S’more was my first 3D canvas and the idea originated after I finished a key fob that had you fold the canvas in half and bind the edges together. For some reason I was looking at it and thinking, “hey, I wonder if you could do this same thing but with a canvas that looks like a cookie or cracker”. That night I sat down, grabbed my ruler and started playing around. Now that I’ve done a few of them, I’m constantly looking for inspiration and playing out in my head, “could I shape a canvas to look like that?” So far, the answer is always yes.
Amanda: Tell us a little bit about your design process, do you often design with the end finish in mind?
Kayla: Usually, yes. I design things now because it’s truly something I want and I want to stitch. So when I design, it’s usually “oh I definitely want X as an ornament, or Y as a purse”. But I also make sure to think about other finishing options for my designs as well. Just because I want our Boo-Gello canvas as a pillow, doesn’t mean everyone will, so I also consider would this design work as a tray or zip pouch, or something I haven’t even thought of? It’s why I always give “Finishing Ideas” for all my canvases - at the bottom of every canvas listing on our site, there is a section for “Finishing Ideas”, where I’ll list a few ways I think the canvas could be finished, just to get the creative juices flowing and to show you don’t have to finish it like my finished example!
Amanda: How did you learn to self-finish originally?
Kayla: A LOT of trial and error. My grandma taught me to sew when I was little, so I’ve been fairly comfortable with a sewing machine/hand sewing for a while, and then I did the Abigail Cecile online ornament finishing class. So between the two, I was like “no time like the present, lets just give it a go!”
My first real test was the 3D smore. This was not only 3D, but was something I had not seen yet in the needlepoint world. I didn’t want to guess at the design, send it to a finisher who had never seen it before, only to get it back 6 months later and have the design be completely wrong. So starting with paper and pencil, I sketched out what I thought would be correct and created my first prototype with paper. Next, I translated that paper to canvas and actually created a prototype from completely blank canvas. Once I had that down, and I could actually start to see “hey, this is going to work”, I stitched the canvases for the first time. Then I just started cutting, sewing and binding and slowly building the first stitched prototype. I honestly couldn’t believe that it had come together!

So my next tasks - 1) time to make this a real design and 2) could I recreate it? Stitched another one - and sadly my dogs got it (RIP s’more pieces). Stitched a third one that had a lot more detail than the first, and this time I documented the entire process - notes, photos, everything - so that I could be sure I could recreate it. This entire process probably took me about 3-4 months. It was lot of work, but to this day, it’s still one of my most favorite projects!
Amanda: Do you have any tips or advice for people who are interested in finishing your canvases or self-finishing generally?
Kayla: Just go for it! And approach that first project with a sense of adventure and curiosity.
Just remember, we were all beginners at everything we do at one point in our life, and after time and practice we got better, and you will get there! That first cut of canvas is going to be scary, but then the hardest part is over.
I would also recommend practicing with scrap materials first - my first ornaments were blank scrap canvas, random DMC thread, and left over fabric I had in my craft room. This was honestly so helpful in overcoming those initial nerves about cutting the canvas and provided a low stakes way to experiment and get comfortable with the steps.

I know that just starting can be bit scary, especially if its your first project, or its one that doesn’t fit the standard ornament shape, so for many of my 3D canvases, I offer a complimentary finishing guide! As I mentioned above, on iteration 3/4, I documented the entire process and with those notes and photos, I compiled that all together and decided to create a finishing guide so that if others wanted to self-finish it like I did they could feel empowered to do so, and have the instructions that I used. Or, if that wasn’t something you wanted, you could still send the instructions to any finisher so they had an idea of what the project is and how it’s assembled. With the PDF guide, which includes written instructions and photos, I also put together a few supplementary videos to demo a few of the techniques used. To this day, when you purchase a 3D s’more (and the 3D grad cap, and 3D shell), you receive this complimentary guide!
Looking Forward
Amanda: What is on your list of finishes or new canvases for you this year? Any hot news you want to share, would love to include!
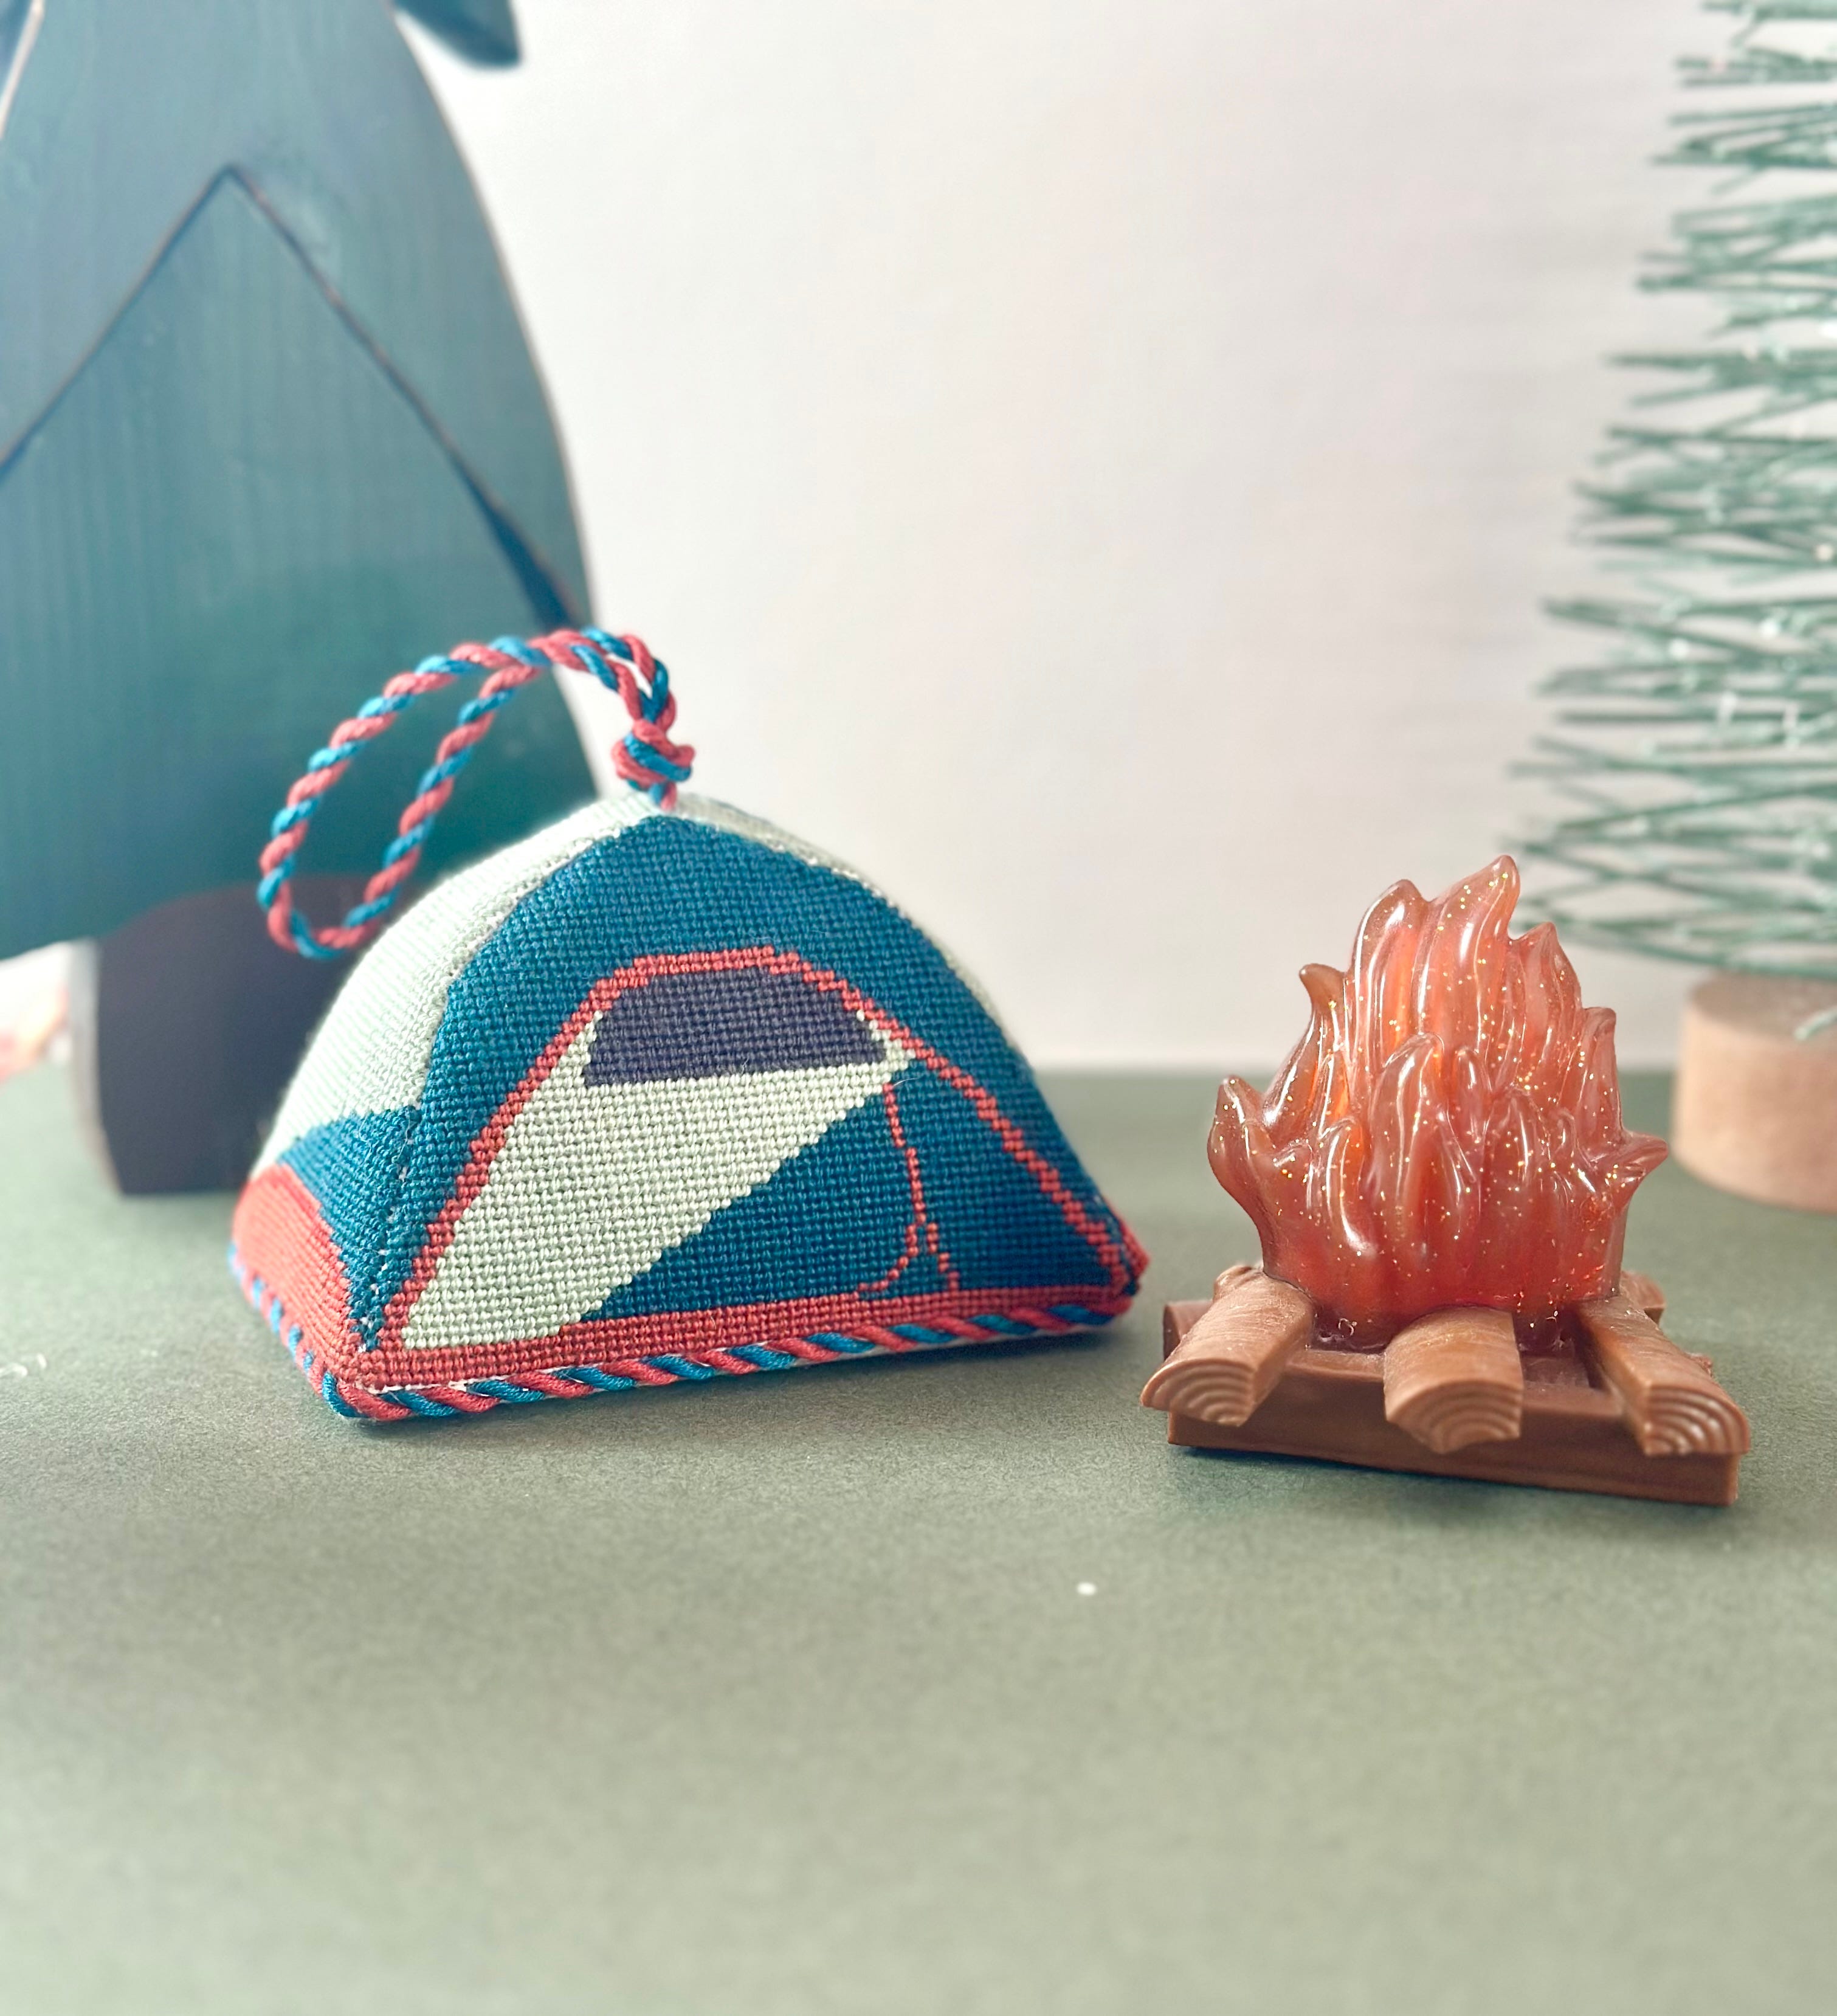
Kayla: You know I can’t go a year without a new 3D canvas! I hopefully have 2, but 1 of them I finished a few weeks ago and it is SO cute. I’ll share a little peek/preview for your subscribers, but it is a 3D tent! I’m totally obsessed with it and want to do a couple in different colors now.
Do you have any thoughts on where the finishing industry is heading?
Kayla: I hope we start see a little boom in finishers soon! With all the new designers and new local shops opening, we’re definitely going to need it to keep up with all the stitching. It’s been really encouraging to see so many who are interested in self-finishing, and I hope that trend of wanting to learn to finish continues. I’ve really loved seeing all the tutorials and tips shared by professional finishers and self-finishers. That knowledge sharing is critical to sustaining the finishing industry and needlepoint as a whole, so it is really wonderful to see so many are engaged with the free tips/tutorials, as well as the paid classes. I know I’m personally eager to learn how to finish stand-ups and pillows this year, and I’m looking forward to taking a few formal classes to learn!
Amanda: Where do you think Fire and Iris is headed next?
Kayla: I’m very excited about where we’re heading! We are (hopefully) adding a new designer to our line this year and I’m REALLY excited that we’ll have our first mini club this year too! This mini club has been a lot of work behind the scenes over the last 6 months and I hope you all love it! We’re otherwise planning plenty of tutorials and needlepoint education for this year, and I’m also hoping to set up a few classes as well!
Thanks to Kayla for taking the time to chat with me! I am excited to see what she has in store for us, especially the 3D canvases - I love.
You can find Fire and Iris on Instagram, @fire.and.iris, and TikTok, @fireandirisdesigns. Shop online at www.fireandirisdesigns.com and use code BTF15 for 15% off now through May 31.