One tricky aspect of stitching is knowing if you need extra rows.
FYI: Extra rows refers to any area outside of the painted design.
They are not always necessary depending on the design but are sometimes helpful.
Clear as mud, right?
The basics
When you don’t need extra rows
Simple shapes (rounds, squares, ovals)
Special shapes that are thicker than the tip of your pinky
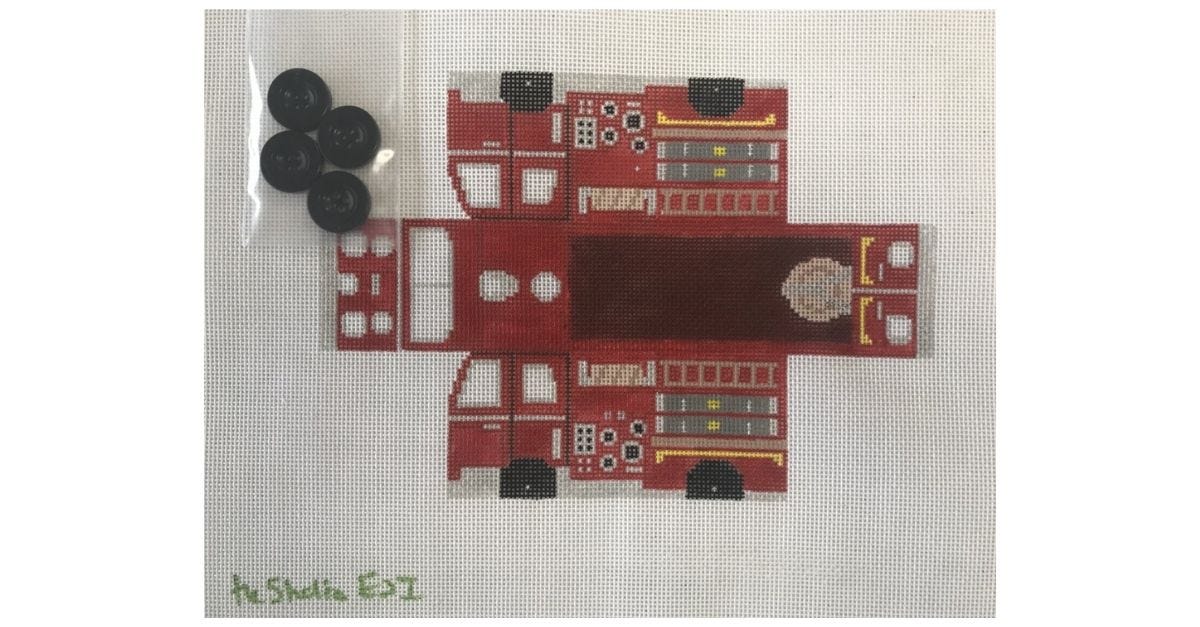
3D shapes - Do not add extra rows to preserve the geometry of the finish
When you absolutely need extra rows
Areas skinnier than the tip of your pinky
White areas in between two painted areas
When you *might want* extra rows
The design has painted details that should be visible to be defined
You applied embellishments like beads near the edge
Why extra rows matter
When you finish a project using an ornament or flat finish, the edge of your stitching should just kiss the table. This means you cannot any exposed canvas. This also means that your stitching wraps slightly around the batting and mat board. So when you apply the cording, some of the very edge of your stitching might be hard to see.
If you want the edge of your design to be visible, add an extra row or two.
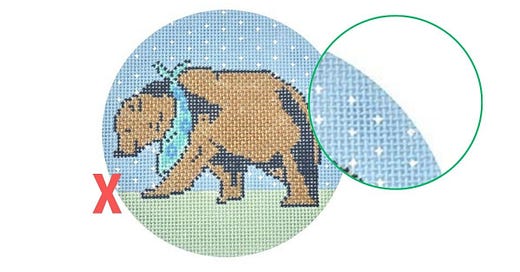
In this example canvas below, you ordinarily do NOT need extra rows. However, if you bead the white star design, or want to see the outermost design, I recommend a few extra rows. Alternatively, leave beads off the edge. It depends!
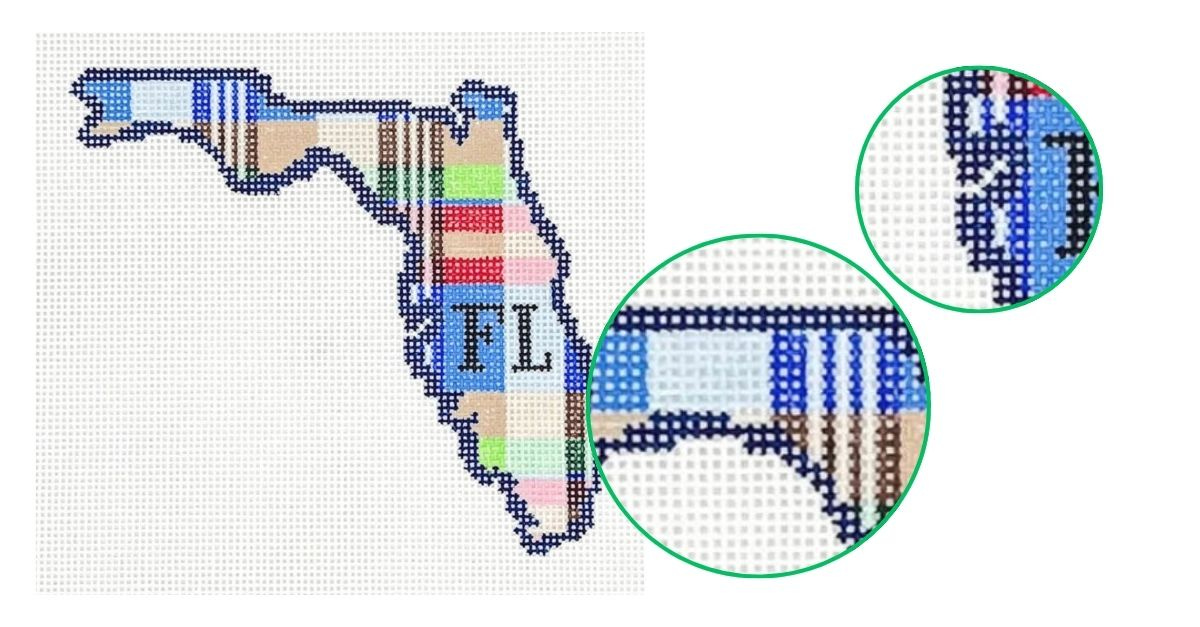
Another reason you may need extra rows is for structural integrity. In the example below, the panhandle area of the design is very narrow. When I finished this project for a client, I added additional reinforcement inside, but without adding too much bulk, it’s best to follow the rule of thumb: pinky width or less, add extra rows.
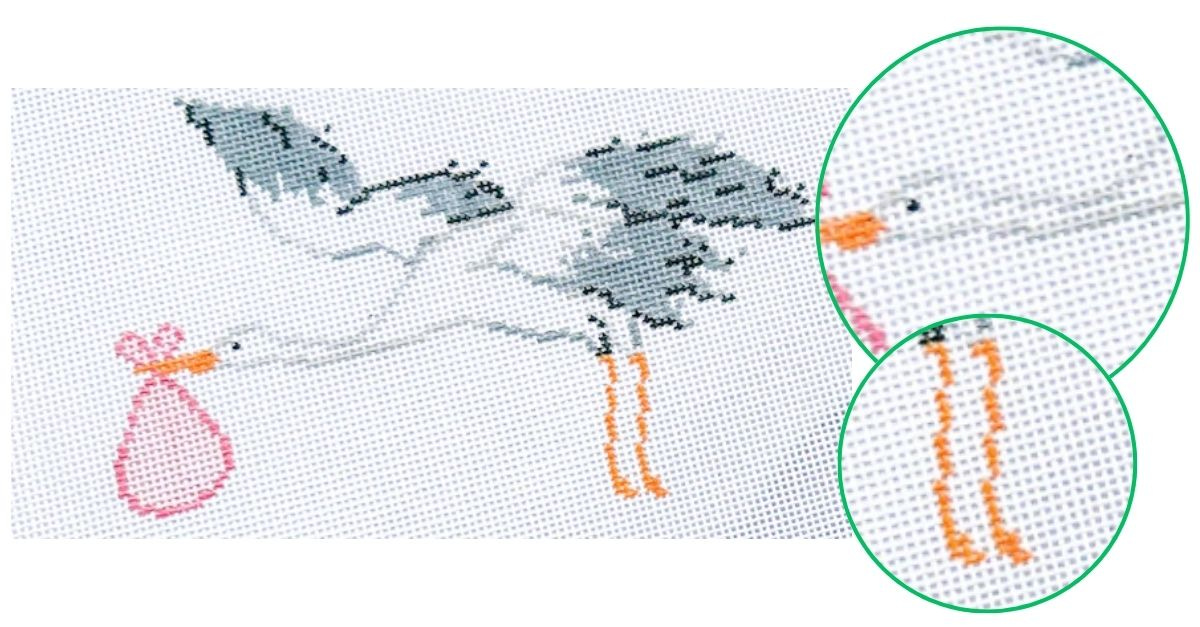
The last reason you may need extra rows is to ensure no white canvas is exposed. If there’s white design areas in between painted stitches or inaccessible by the finisher, these are best stitched.
You can see this in the photo highlight in Florida bays above or between the stork legs in the example below.
Additionally, you’d need extra rows on either side of the stork neck, the bag, the wing tips, etc. This canvas is designed to have a background as the detailed stitch guide outlines.
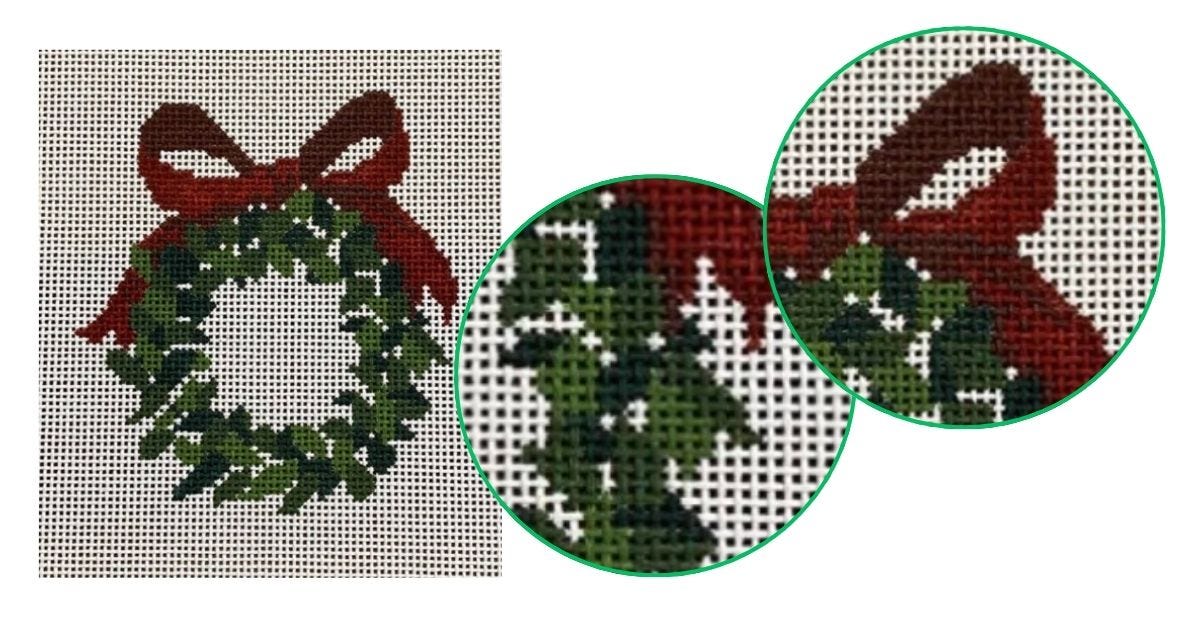
Another common design that I see among stitchers (and one of my favorites myself), is the classic monogram wreath by SCT Designs pictured below. Here you can see that the leaves do not have painted background between them. Additionally, the finisher cannot get the points of the leaves super sharp during finishing. Finally, there’s not a way to access the small area within the bow. All of this needs to be stitched.
As mentioned above, do not stitch extra rows on 3D designs. I’m stitching three 3D canvases and will share process videos. I am not stitching extra rows on them as they will not have cording. Stitching extra rows would affect the geometry of the finish.
I also put together a quick video of this on YouTube if you are interested. You’ll see a few additional examples from my stash.
As you progress in your stitching, you’ll start stitching with the end in mind. It will come naturally. If you’re sending in a project for finishing and you’re unsure, please send me a picture so I can help.
Canvas Sources and Photo Credits:
Benjamin Bear, Photo Credit Needlepoint.com
Stork and Military Jacket, Photo Credit Stitch-Style
Florida, Photo Credit SG Designs
Wreath, Photo Credit KC Needlepoint
3D Firetruck, Photo Credit Magic City Needlepoint
Patriotic House, Video Only, Audrey Wu




This is a fabulous point of reference! Thank you for sharing this in such thorough detail 🧵
Hi, Amanda! Great video. Questions: when you pointed to the white area on the military uniform, would you stitch the area between the sleeves and the body in white and the extra row on the lower left sleeve in black?
When you pointed out the small area on the house and said you would add an extra row or two, did you mean only the area you were pointing to or would you add an extra row or two around the entire house as you suggested for the stork canvas?
Many thanks for adding this section on your substack —it’s great to be able to reference it anytime I have a few extra minutes.